Replacing your brake fluid and bleeding the system of air bubbles is regular maintenance that your owner’s manual will likely suggest doing once every two years. Brake fluid needs to be replaced because it degrades with use—water gets absorbed out of the air and reduces the boiling point, and air bubbles can sneak past the seals and make the lever spongy. Replacing the fluid solves both of those issues, and we walk you through the entire process in how to bleed your motorcycle brakes tutorial from MC Garage.
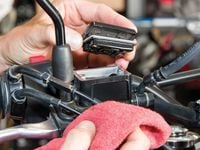
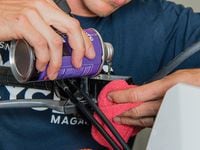
Before you start removing bolts and flushing fluid, take a second to wipe down your brake reservoir, calipers, and brake lines with a clean rag. This will ensure that you aren’t contaminating your pads or getting dirty fingerprints all over your bike. When everything is wiped down, go ahead and turn the handlebar so the fluid within the reservoir is level. Then carefully remove the cap and diaphragm and set both aside on a clean towel, taking note of the condition of the diaphragm. If it is worn, cracked, or torn order a replacement.
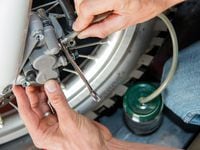
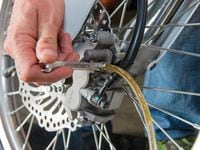
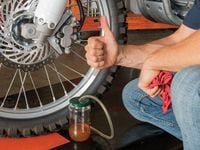
Pump the brake lever to pressurize the system and—with the lever still pulled in—crack the bleeder screw just loose enough to allow the pressurized fluid to escape. Allow the lever to come almost back to the bar then close the bleeder bolt. Don’t release the lever until you’ve closed the bleeder bolt. Keep an eye on the fluid level in the reservoir as you repeat this step.
Repeat the previous step until the brake fluid reservoir is almost empty. Refill it with new brake fluid until fresh, clear fluid is seen in the hose; it could take dozens of tries so be patient. Do not let the reservoir go empty if you do allow it to run dry it will introduce air into the master cylinder and the bleeding process will take a lot longer.
Finally, tighten the bleeder bolt, remove the hose, fill the reservoir to the proper level, reinstall the diaphragm and cap, and you’re done. Brake fluid does nasty things to paint, so make sure to wipe up any spills with a damp rag. Before you set out on for a transcontinental adventure, take the bike out around the block, testing the brakes and lever feel. If the lever feels spongy, you introduced air bubbles into the line and need to start over.
/cloudfront-us-east-1.images.arcpublishing.com/octane/IN263JIBTBCD3O265IMSCW6OZM.jpg)
/cloudfront-us-east-1.images.arcpublishing.com/octane/SMAQ354X2JH7NJATXNSQY4NRS4.jpg)
/cloudfront-us-east-1.images.arcpublishing.com/octane/GGOH2AQRSVHY5C5JLNEVYLB5SU.jpg)
/cloudfront-us-east-1.images.arcpublishing.com/octane/TJJEHV3ATZFFXHUYZABHXKE2DI.jpg)
/cloudfront-us-east-1.images.arcpublishing.com/octane/WIC4RXQ36BAXNIW6U4UJ3XDLKI.jpg)
/cloudfront-us-east-1.images.arcpublishing.com/octane/B4PQZLY4LBHITGE5ZRRM2N5YNU.jpg)
/cloudfront-us-east-1.images.arcpublishing.com/octane/OBYS7KWZUJFCHD44YPTSVM5EF4.jpg)
/cloudfront-us-east-1.images.arcpublishing.com/octane/FY7ZXYBT4NH2NGYQIWQVITS4AM.jpg)
/cloudfront-us-east-1.images.arcpublishing.com/octane/JPET6WQUDZEYLNXVY5LRNDRPLA.jpg)
/cloudfront-us-east-1.images.arcpublishing.com/octane/EY6P2QIFQJCDTNOMR3JB7WJED4.jpg)
/cloudfront-us-east-1.images.arcpublishing.com/octane/V2U6JB7KXNCQRN4OW6HNJTVMZQ.jpg)
/cloudfront-us-east-1.images.arcpublishing.com/octane/AMS43BT5ABH77NY7XKLCSZCNM4.jpg)
/cloudfront-us-east-1.images.arcpublishing.com/octane/NTK2ASYKUBDW5MQDWQLVQYOELY.jpg)
/cloudfront-us-east-1.images.arcpublishing.com/octane/SX7R3KCIANGDBGF45O73F543TM.jpg)
/cloudfront-us-east-1.images.arcpublishing.com/octane/ZTW4V7RAPFG6RFWJRXR2IX5ZQ4.jpg)
/cloudfront-us-east-1.images.arcpublishing.com/octane/EPRSLPIUTBC5RPD7R263BPV2D4.jpg)
/cloudfront-us-east-1.images.arcpublishing.com/octane/EMJ4I2T4HVCRVJPZ3UJFVMRDHA.jpg)
/cloudfront-us-east-1.images.arcpublishing.com/octane/CBDAM3VMJNFDBLE7Y3FY7RD5BY.jpg)
/cloudfront-us-east-1.images.arcpublishing.com/octane/CCEB3TNMU5FH3OZ4FKJ7DA2LBA.jpg)
/cloudfront-us-east-1.images.arcpublishing.com/octane/VV6N3KUWEVFJJD7F7VX6ICOH7Q.jpg)
/cloudfront-us-east-1.images.arcpublishing.com/octane/R55SVEXZ5VA2LCWFWYR647ASX4.jpg)
/cloudfront-us-east-1.images.arcpublishing.com/octane/MYWIEFOQ6JCCNDR4OBF5PU5LVE.jpg)
/cloudfront-us-east-1.images.arcpublishing.com/octane/OOZ3C4GCUJGRNONDI6DHVM57GI.jpg)
/cloudfront-us-east-1.images.arcpublishing.com/octane/JEKB3CMWXZD6ZAVFEDKLOQ5FNY.jpg)