/cloudfront-us-east-1.images.arcpublishing.com/octane/EBSGFGUZMLS5RNQIHATBSMF7VU.jpg)
The helmet is your most important piece of safety equipment. Is it up to the task of protecting your head? Age, damage, and wear can all affect your lid’s ability to do its job. As you gear up for summer riding, make sure your helmet is as ready to ride as you are.

Step 1
Step 2
Step 3
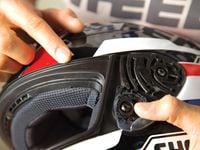
Step 4
Step 5
/cloudfront-us-east-1.images.arcpublishing.com/octane/7OWQWAWJBFCGTAYQWBMWGNMNB4.jpg)
/cloudfront-us-east-1.images.arcpublishing.com/octane/4G5XKCDIHRCGRHVF7OPORG7ZX4.jpg)
/cloudfront-us-east-1.images.arcpublishing.com/octane/D2BDYKKNZ5GRHGDMI4PZTGRMME.jpg)

/cloudfront-us-east-1.images.arcpublishing.com/octane/UAY4WSZPOFDQRP4MCEXAKDFQOQ.jpg)

/cloudfront-us-east-1.images.arcpublishing.com/octane/X5CE3KSJHZHM5CUFGPZ7U26WB4.jpg)
/cloudfront-us-east-1.images.arcpublishing.com/octane/COWLTPGFAFGDDGJCTENYMA4VJM.jpg)
/cloudfront-us-east-1.images.arcpublishing.com/octane/H3PKUGPSUJFTND4RFPSI4OIDCE.jpg)
/cloudfront-us-east-1.images.arcpublishing.com/octane/UHGQA3MQDFCA3HLBWF7S76WH6Y.jpg)
/cloudfront-us-east-1.images.arcpublishing.com/octane/Q5EORCSTNFAVBJC4IYUHIKJTXQ.jpg)
/cloudfront-us-east-1.images.arcpublishing.com/octane/XIJ5FUFSP5A3NL7MOVZGJXAHC4.jpg)
/cloudfront-us-east-1.images.arcpublishing.com/octane/V5NZN3CGS5B5PPYFYJHIPAU5S4.jpg)
/cloudfront-us-east-1.images.arcpublishing.com/octane/CZE6ONOBU5E7HPIEEADU376C4M.jpg)
/cloudfront-us-east-1.images.arcpublishing.com/octane/UT4KL3SIYJBSPNHWJXTBE6MTGE.jpg)
/cloudfront-us-east-1.images.arcpublishing.com/octane/Q3UOIDZ22ZEVDBZUWGJXIMGJKI.jpg)
/cloudfront-us-east-1.images.arcpublishing.com/octane/YQM66WXZV5AAXNNOIUVOGVXZMY.jpg)
/cloudfront-us-east-1.images.arcpublishing.com/octane/J47NFTXNLFFGHELHZCUD2LCITA.jpg)
/cloudfront-us-east-1.images.arcpublishing.com/octane/NXPQBTLX3NCILKQ2GCFJYNIDEM.jpg)
/cloudfront-us-east-1.images.arcpublishing.com/octane/6U7NJLAYMRBZTIGNKWIA5OK2FQ.jpg)
/cloudfront-us-east-1.images.arcpublishing.com/octane/IYTZQWUROVC25IMTDEWUDQ5IQE.jpg)
/cloudfront-us-east-1.images.arcpublishing.com/octane/YJODDXEL2ZB5TENKPPN4BEYJAE.jpg)
/cloudfront-us-east-1.images.arcpublishing.com/octane/QEQQUZYNJFAIJB4DZFVFSNTCQ4.jpg)
/cloudfront-us-east-1.images.arcpublishing.com/octane/F4EEHDT3UZFKPLKVGDWMMPFEQE.jpg)